Sect. 11, Technical Details, Drawings, and Schematics
Various technical drawings, photos, and specifications follow to help the users understand the construction of the system’s components.
Detector/Timestamp Generator Assembly, with Internal Data Logger

Front and Rear Panels

ERGO Timestamp Generator
Sub-systems
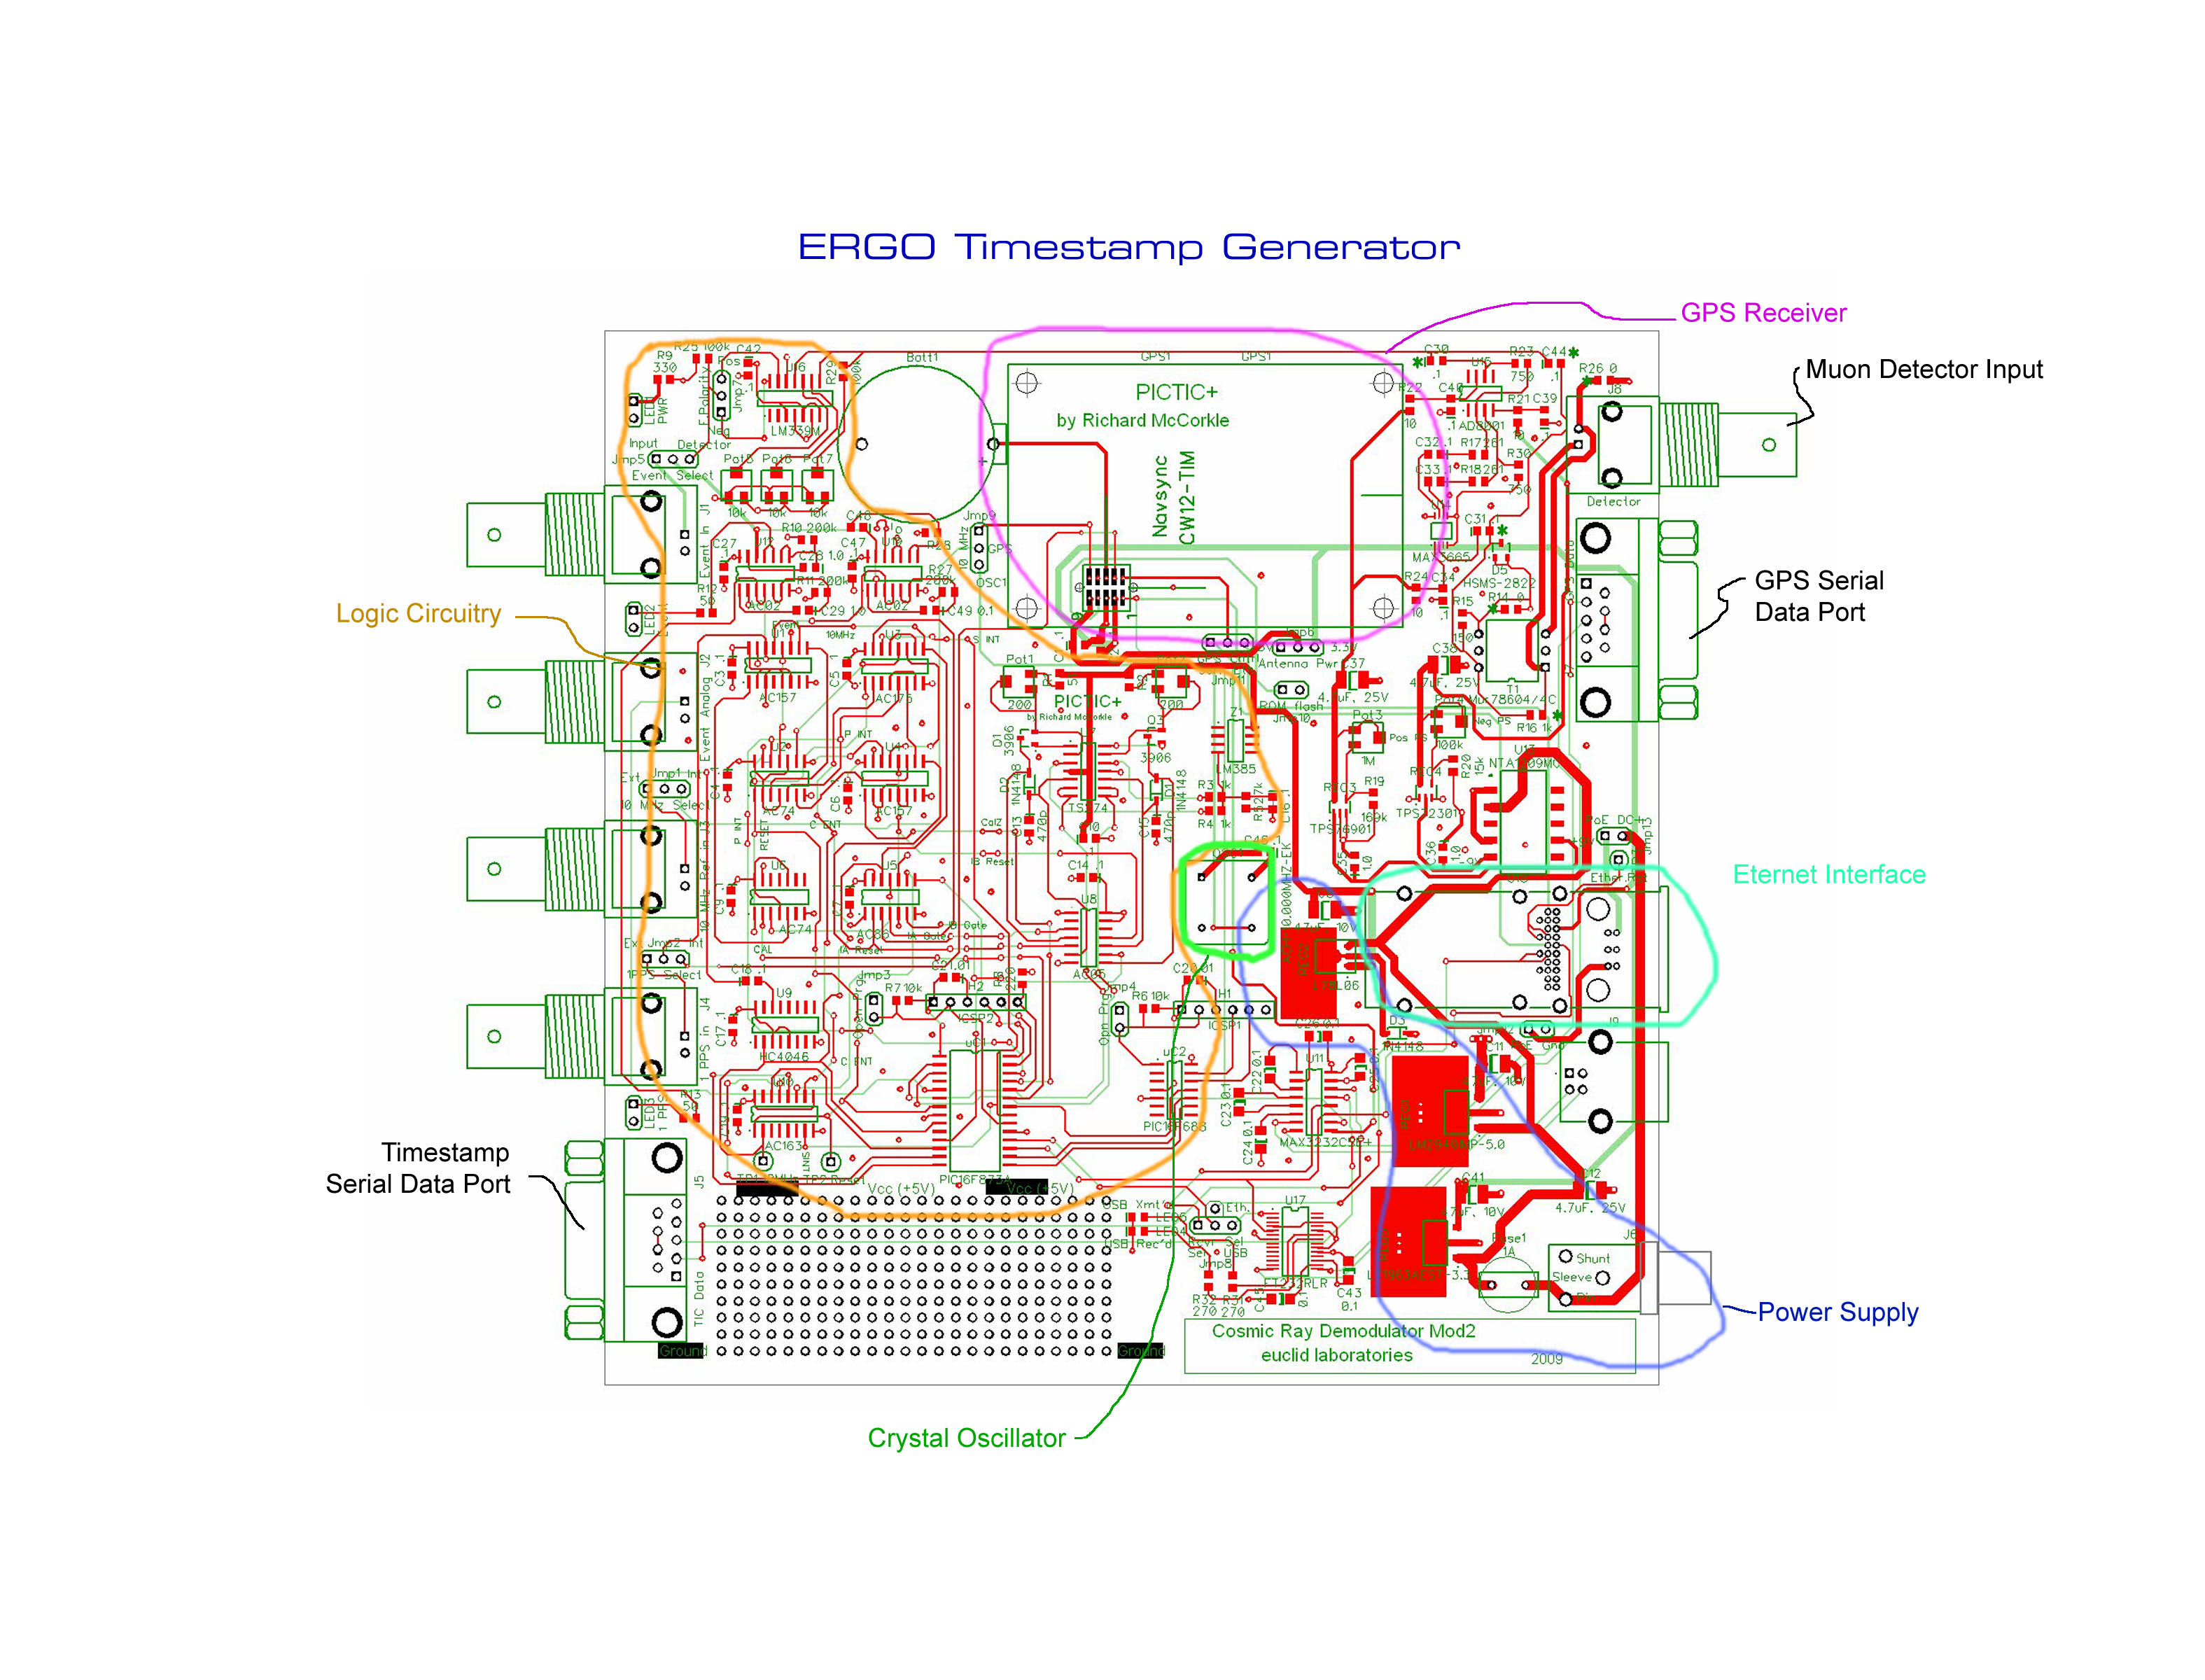
ERGO Timestamp Gen. Schematic

ERGO Beta-3 Timestamp Generator Set-up and Calibration
(performed by euclid laboratories)
- Adjust low-voltage regulator in G-M Muon Detector to 5.50 volts
- Connect G-M Muon Detector to Timestamp Generator board (signal and power leads)
- Connect GPS Antenna to Timestamp Generator
- Verify that the polarity jumper (Jmp7) is on “Negative”
- Adjust threshold (Pot6) to one-quarter turn clockwise from the setting where the blue “Event” LED goes from constantly-on to intermittent. If events are not being detected, a setting between one-eighth and one-half turn CW is acceptable
- Verify that events are being randomly detected, a few seconds apart.
- Connect the LAN cable and verify data are being sent by the Timestamp Generator.
ERGO Database Manager Local Installation
For Microsoft SQL Management Studio Express
Installing Microsoft SQL 2008 Server Management Studio with Advanced Features
- Download the package software from Microsoft. The version to use for XP and other 32-bit Microsoft operating systems (XP Pro and Windows 7 32-bit) is SQLEXPRADV_x86_ENU.exe. You can find it with Google.
- Run installation package: SQLEXPRADV_x86_ENU.exe
- Select “Installation” from left-hand list.
- Select first option: New SQL Server stand-alone installation or add features to an existing installation
- When “Setup Support Rules” comes up, fix any issues, such as installing Microsoft Power Shell or re-starting the computer. If no errors are reported, click “Close”
- When “Setup Support Files” comes up, click “Install”
- If no issues, click “Next”
- Click “Next” again to install the free version
- Click the box “I accept the license terms” and click “Next”
- Click “Select All” and then “Next”
- In “Instance Configuration” box, the Named instance should be dotted and indicate “SQLExpress”; the Instance ID should be “SQLExpress”; the Instance root directory should be “C:\Program Files\Microsoft SQL Server\”. Click “Next”
- The next box “Disk Space Requirements” indicates how much space is required and how much is available. Click “Next”
- The next box, “Server Configuration” needs the Account Name and password to be entered:
SQL Server Database Engine: in “Account Name” select NT AUTHORITY\NETWORKING…
Password: blank
Sql Server Reporting sServices: in “Account Name” select NT AUTHORITY\NETWORKING…
Click Next - The next box, “Database Engine Configuration,” under the “Account Provisioning” tab, select Mixed Mode (SQL Server authentication and Windows authentication); enter the Windows user’s sign-on password (4159), and click “Add Current User”; then click “Next”
- The next box, “Reporting Services Configuration,” should have the “Install the native mode default configuration” circle dotted.; click “Next”
- The next box, “Error and Usage Reporting” doesn’t need anything checked; click “Next”
- The next box, “Installation Rules” should report no errors. Click “Next”
- The next box, “Ready to Install” gives a lot of information. Click “Install”
- It takes a lot of time, and a whole lot of stuff happens while the progress bar progresses.
- When completed, a message will appear that says you need to restart the computer. Click “Next”
- The next box, “Complete,” says the installation completed successfully, and a pop-up box says “You must restart the computer to complete SQL Server Setup”; Click “OK” in that box and the big box will close.
Setting Up Management Studio for ERGO Telescope Data
- Run Microsoft SQLL Server Management Studio
- When the “Connect to Server” box pops up, select Server type as “Database Engine”; Server name: s03.winhost.com; Authentication “SQL Server Authentication”; Login: DB_13669_cosmic_user; Password: edc123ijn; “Remember Password”; click “Connect”
- Click on Databases in the left-hand tree menu to open it. Click on DB_13669_cosmic; Tables; System Tables; dbo.eventraw; columns; rawdata; double-click to bring up “Column Properties” box; click “Close”
- Click “New Query” in upper left-hand toolbar (just below “File” tab).
- In upper window, under “SQLQuery1.sql” tab, type : select * from eventraw
- Click “!Execute” button
- Data will be listed in lower window.